Skip to content

How to Boost Your Immune System Naturally With These 3 Yoga Poses
Support Your Overall Wellbeing Through Movement, Breathing and Recovery
By Dav Jones, Senior Yoga Teacher and Teacher Trainer
Can yoga really “boost” your immune system?
Not in the simplistic way that phrase is often used online.
Your immune system is an extraordinarily complex network that is working all the time. Its function is influenced by numerous factors including sleep, nutrition, physical activity, stress, recovery, age and your overall state of health.
So when someone asks me, “How can I naturally strengthen my immune system?”, I don’t believe the answer is to identify one supplement, one breathing technique or one yoga posture.
Yoga can, however, form part of a much broader approach to looking after your health.
A consistent yoga practice gives you opportunities to move, develop strength and mobility, become more aware of your breathing, regulate the intensity of physical activity and create deliberate periods of recovery.
There is also research investigating yoga and markers associated with inflammation and immune function, but this does not mean that an individual posture directly “boosts” your immune system.
That distinction is important.
Rather than asking which pose will improve your immunity, a more useful question might be:
How can I use movement, breathing and recovery to better support my overall health?
That is the approach we’re going to take here.
We’ll explore three familiar yoga postures:
- Child’s Pose – Balasana
- Downward-Facing Dog – Adho Mukha Svanasana
- Legs-Up-the-Wall – Viparita Karani
But rather than simply showing you the shape of each posture, I want to look at how your body is interacting with it.
Because the posture itself is never the whole story.
The person practising it matters far more.
Before the Poses: Think Beyond the Pose
One of the biggest limitations I see in conventional yoga instruction is the assumption that a posture has the same effect on everybody.
It doesn’t.
Two people can perform something that looks almost identical from the outside while experiencing very different loads internally.
Their skeletal structure may differ.
Their available range of motion may differ.
Their strength at the end of that range may differ.
Their previous injuries, training history, breathing mechanics and tolerance to load may all differ.
This is why I prefer to teach people rather than postures.
A yoga posture is not inherently therapeutic simply because it is a yoga posture. Its usefulness depends on the person performing it, the intention behind it, the amount of load involved and how their body responds.
The same principle applies when we talk about health.
Yoga is one part of a much bigger picture that includes regular physical activity, adequate sleep, balanced nutrition, stress management, recovery and appropriate healthcare.
And sometimes the most useful practice isn’t another demanding workout.
Sometimes it is learning when to reduce intensity.
That doesn’t make the practice less valuable.
It makes it more intelligent.
1. Child’s Pose – Balasana
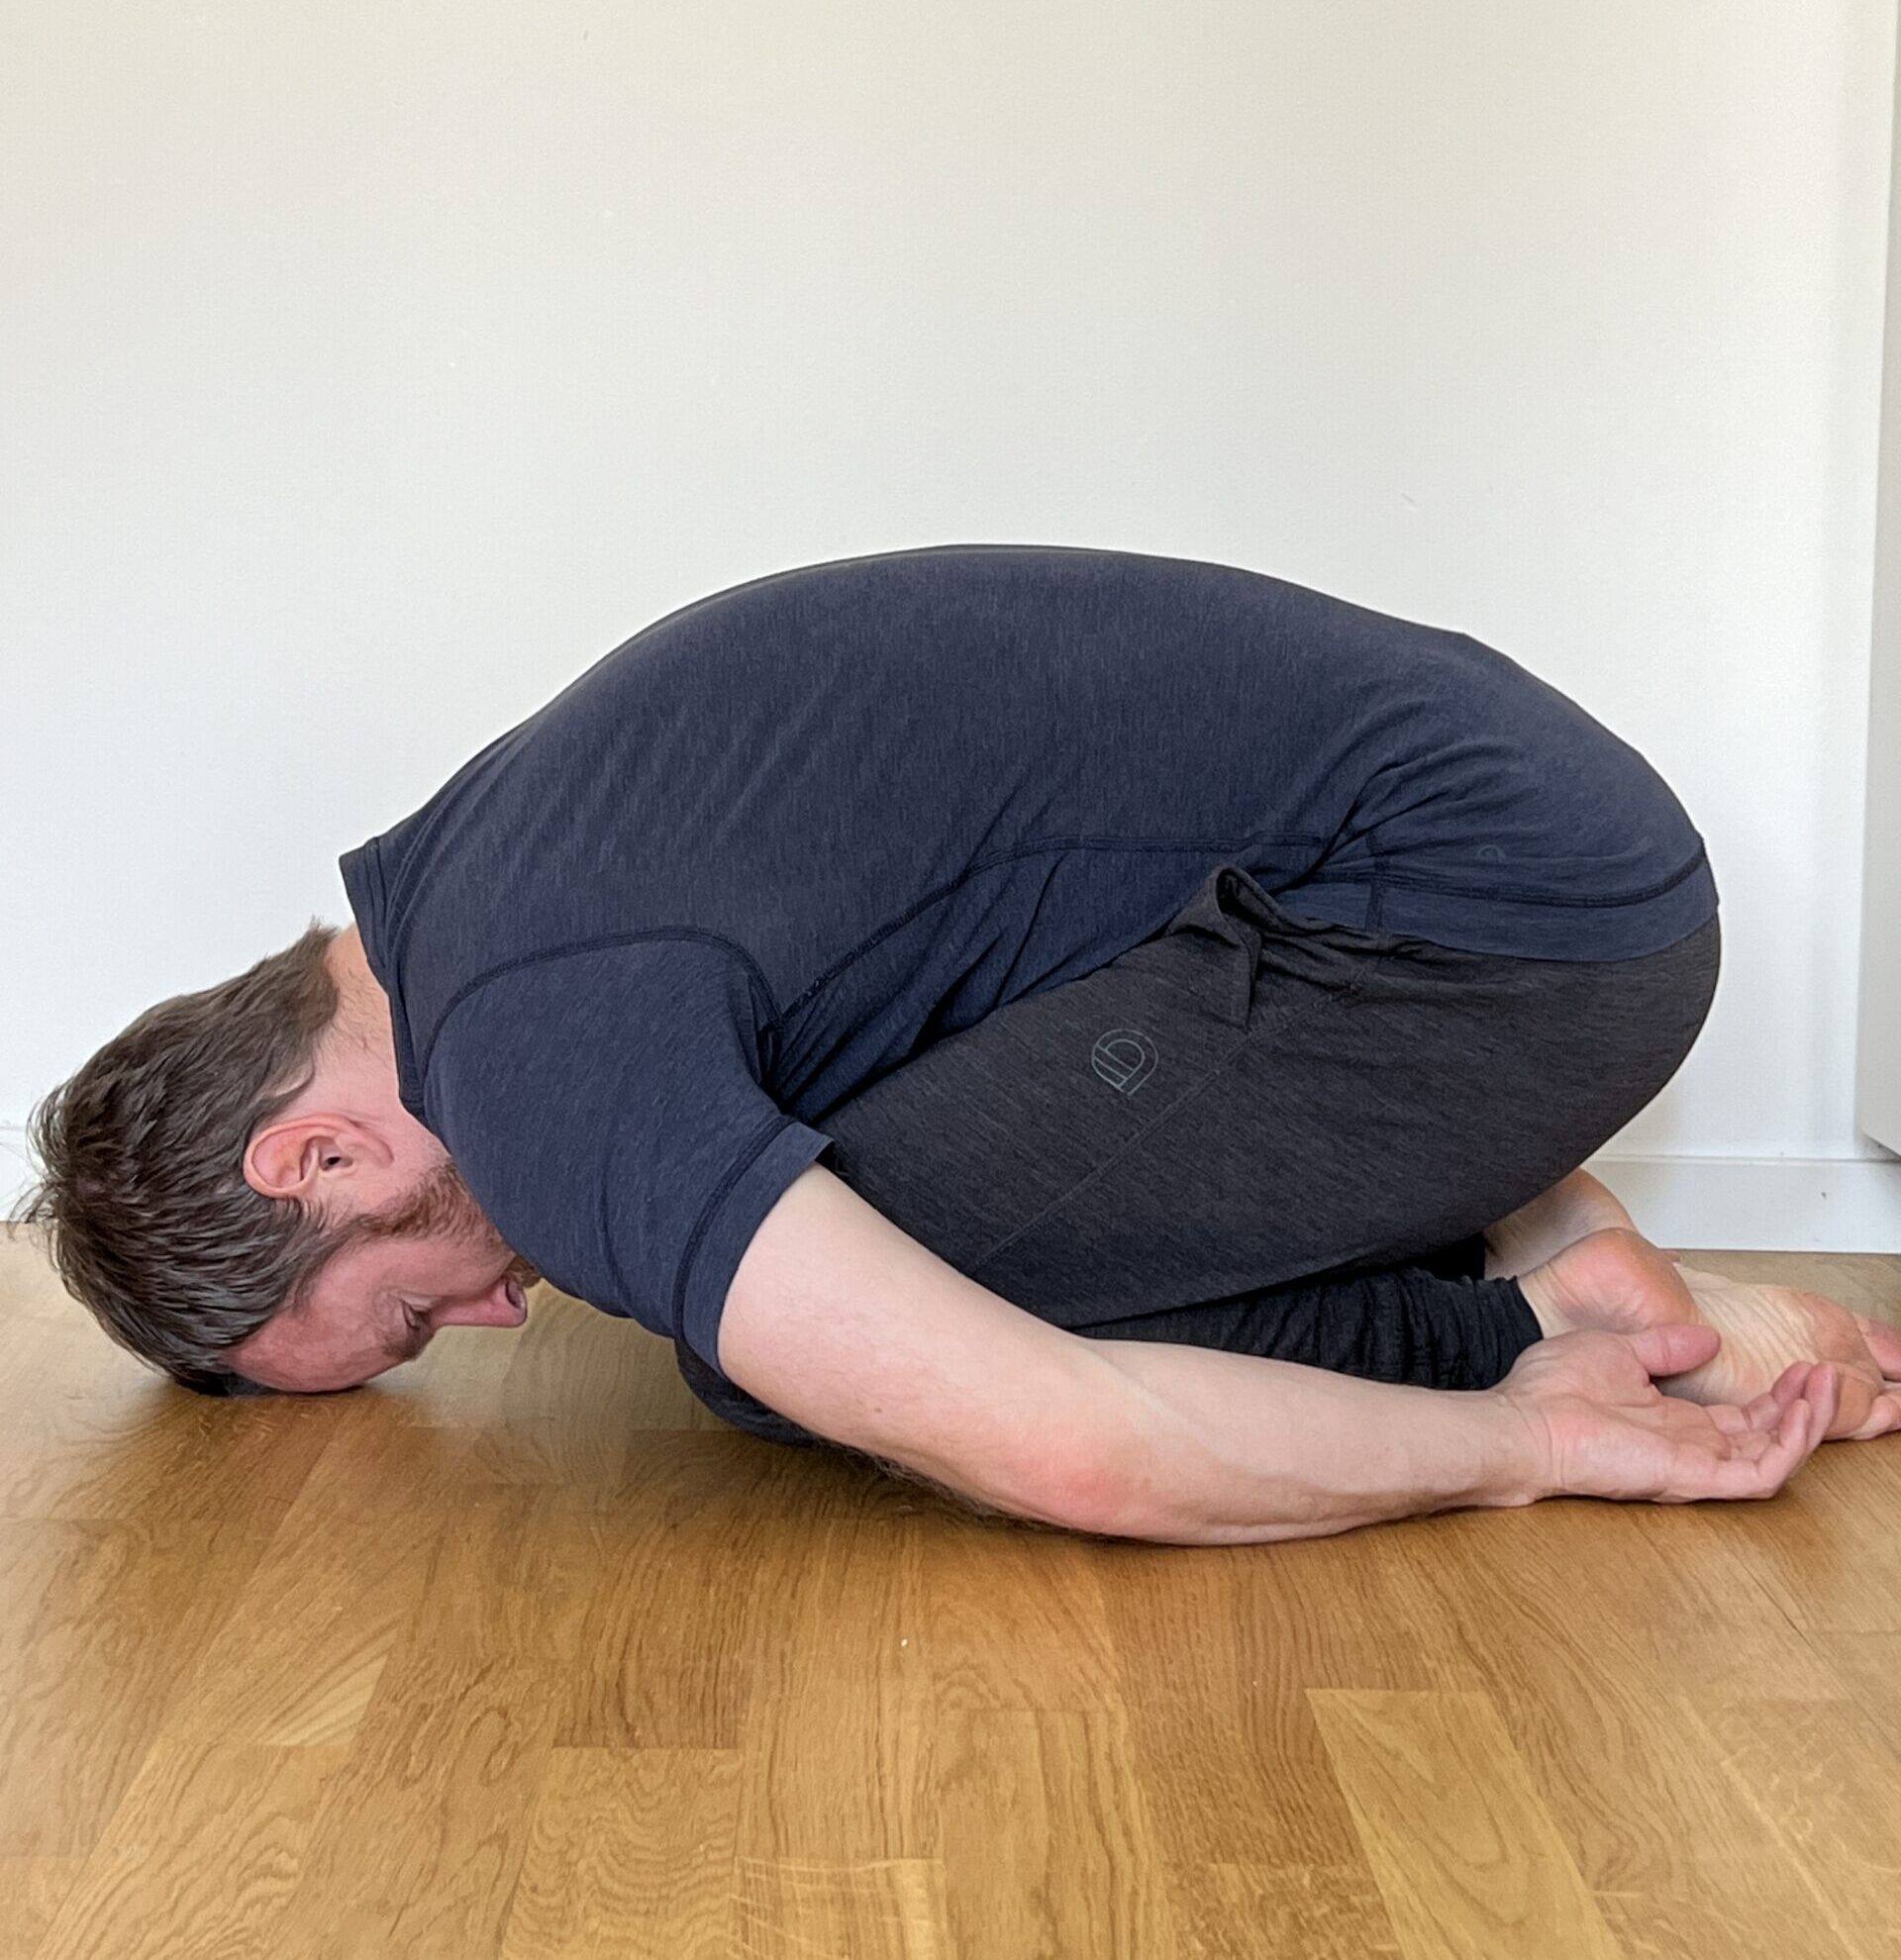
Child’s Pose is often described simply as a resting posture.
But it can also provide a useful environment for exploring the relationship between your hips, spine, rib cage and breathing.
Rather than asking:
“How deeply can I get into Child’s Pose?”
Try asking:
“What can I learn about my body while I’m here?”
Why Include Child’s Pose?
Child’s Pose can provide an opportunity to:
- Reduce the overall physical demand of your practice
- Explore comfortable hip and spinal flexion
- Observe movement of the rib cage
- Develop greater awareness of your breathing
- Transition between more demanding movements
- Introduce periods of deliberate recovery
Its value isn’t that Child’s Pose directly strengthens your immune system.
Its value is that it gives you another movement and recovery option within a broader practice.
Start Here
Begin on your hands and knees.
Slowly move your hips backwards towards your heels.
Your knees can remain closer together or move further apart depending on your proportions, available hip range and what feels appropriate for your knees.
Allow your torso to move forwards.
If your forehead comfortably reaches the floor, let it rest there.
If it doesn’t, bring the floor towards you by using a yoga block, bolster, cushion or folded blanket.
There is no prize for reaching the floor.
Support the position you actually have rather than forcing yourself into the position you think you should have.
Explore Your Breathing
This is where Child’s Pose becomes particularly interesting.
As the thighs come towards the abdomen, you may notice that the front of the abdominal wall has less freedom to move than it does when you’re standing or lying on your back.
Instead of immediately trying to take the biggest breath possible, simply observe what happens.
Can you feel movement through the sides of your rib cage?
Can you perceive expansion through the posterior ribs?
Can the breath remain three-dimensional rather than being driven predominantly forwards into the abdomen or upwards into the chest?
The diaphragm doesn’t work in isolation.
Breathing involves a coordinated relationship between the diaphragm, rib cage, abdominal wall and the pressure generated within the trunk.
You don’t need to force that process.
Use the posture as an opportunity to witness it.
That awareness itself can become part of your practice.
Develop the Movement
From Child’s Pose, walk both hands slightly towards the right.
Notice what happens through the left side of the rib cage and trunk.
Return to centre and explore the opposite side.
You could also move gently between Tabletop and Child’s Pose rather than holding the posture passively.
This introduces another important principle:
Mobility isn’t only about having range of motion. It is also about your ability to move into, out of and eventually control that range.
Sometimes a passive position is useful.
Sometimes active movement is more useful.
A well-rounded practice contains both.
Common Mistakes
- Forcing the hips towards the heels
- Continuing despite knee or ankle pain
- Trying to manufacture an excessively deep breath
- Pulling aggressively through the shoulders
- Assuming the forehead has to reach the floor
- Treating relaxation as another performance
- Staying in the position simply because you’ve been told it is a “resting pose”
Child’s Pose should adapt to you.
You shouldn’t have to fight your body to make it look like Child’s Pose.
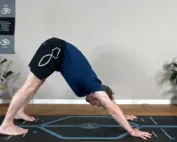
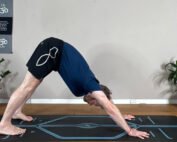
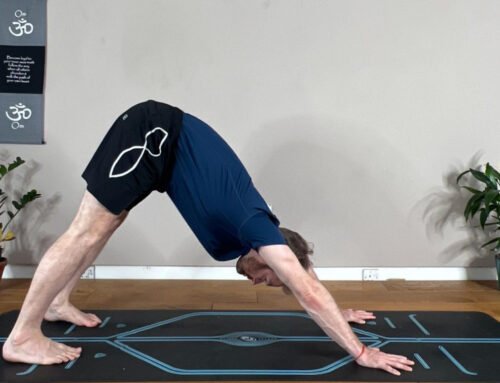
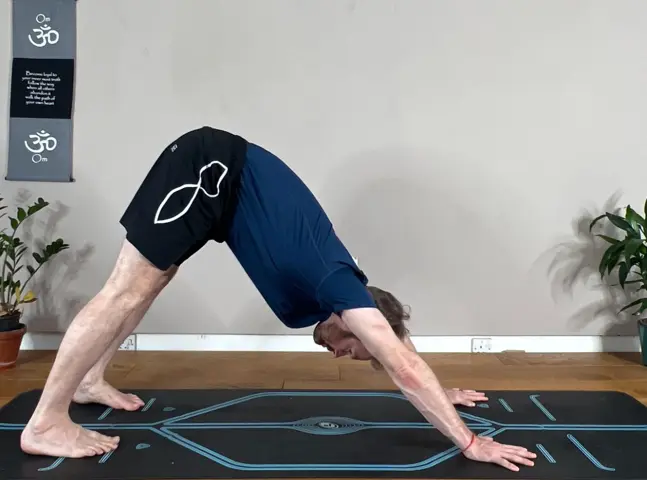
2. Downward-Facing Dog – Adho Mukha Svanasana
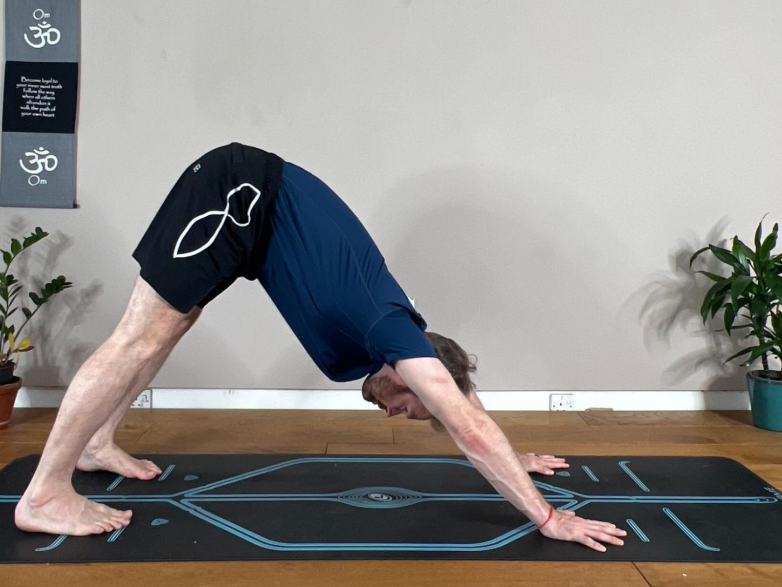
Downward-Facing Dog introduces considerably more load.
Your hands are now weight-bearing, your wrists are working in extension, your shoulders are supporting part of your body weight and your hips and legs are interacting with the position simultaneously.
This makes Downward Dog much more than a hamstring stretch.
It is a whole-body loading strategy.
And this is where the details matter.
Why Include Downward-Facing Dog?
Downward Dog can be used to explore:
- Weight-bearing through the hands and wrists
- Shoulder flexion and scapular control
- Upper-body strength and endurance
- Hip flexion
- Knee and ankle movement
- Coordination between multiple joints
- Breathing under moderate physical demand
- Your ability to distribute load throughout the body
Again, none of those things mean Downward Dog directly “boosts” your immune system.
It simply provides one useful movement option within a physically active lifestyle.
Start With the Hands
Begin on your hands and knees.
Rather than simply “spreading your fingers wide”, pay attention to where you are actually putting pressure into the floor.
I like to establish a relationship between the first knuckle – around the base of the index finger – and the pisiform region on the little-finger side of the heel of the hand.
Think of these as important contact points rather than allowing all of your body weight to collapse backwards into one area of the wrist.
Your fingers can remain active without desperately gripping the mat.
Then notice your wrists.
Downward Dog places the wrist into loaded extension.
If this feels difficult, the solution isn’t necessarily to repeatedly force yourself deeper into wrist extension.
You may need to develop the capacity of the wrist separately.
That might involve:
- Passive wrist range-of-motion work
- Active wrist range of motion
- Controlled loading
- Isometric strength
- Gradual exposure to greater amounts of weight-bearing
This is an important distinction.
Having passive range doesn’t automatically mean you have strength and control within that range.
Both matter.
Move Into Downward Dog
From Tabletop, tuck your toes and begin moving your hips upwards and backwards.
Keep your knees bent initially.
Forget about your heels.
They do not need to touch the floor.
Instead, notice the relationship between your hands, shoulders, spine, pelvis, knees and ankles.
Press the floor away.
As you do this, observe what happens around the shoulder blades.
The scapulae aren’t fixed structures. They move in relationship to the rib cage as your arms move and bear load.
Rather than simply “pulling the shoulders down”, allow the shoulder complex to participate in the position.
The goal isn’t to manufacture somebody else’s Downward Dog.
The goal is to organise your own body effectively under load.
Explore the Kinetic Chain
Now bend one knee while gradually straightening the opposite leg.
Then change sides.
Notice what happens.
Does the ankle position change?
Does the knee straighten?
Does the pelvis rotate?
Does the sensation you associate with your “hamstrings” change?
This is useful because movement rarely occurs at one joint in isolation.
What looks like a limitation at one area may be influenced by several different parts of the kinetic chain.
And if your heels don’t reach the floor, it doesn’t automatically mean that your calves or hamstrings are “tight”.
Available range can be influenced by muscular tension, neural tolerance, joint structure, previous training and the relationship between several joints.
Your body isn’t failing the posture.
The posture is simply giving you information.
Active Range Versus Passive Range
This is one of the principles I emphasise repeatedly in my teaching.
Flexibility and mobility are not exactly the same thing.
You might be able to use gravity, the floor, a strap or another person to move a joint into a particular position.
That demonstrates available passive range.
But can you actively move yourself there?
Can you control the position?
Can you generate force there?
That tells us something different.
Developing useful mobility therefore isn’t simply about stretching further.
It is about developing access and control.
This principle applies to your wrists in Downward Dog.
It applies to your shoulders.
It applies to your hips.
And it applies throughout your yoga practice.
Can You Still Breathe?
Once you’ve established your Downward Dog, notice your breathing.
Not because there is one perfect breathing pattern you need to achieve, but because breathing gives you information about the intensity of the task.
Ask yourself:
Can I maintain this amount of effort while continuing to breathe comfortably?
If the answer is no, change something.
Bend your knees.
Reduce the duration.
Come down to Child’s Pose.
Change the position of your hands.
Rest.
Adjusting the posture isn’t failure.
It is autoregulation.
And learning to regulate effort is a valuable part of any sustainable movement practice.
Common Mistakes
- Forcing the heels towards the floor
- Assuming straight legs make the posture “better”
- Dumping excessive pressure into the wrists
- Losing contact through the first knuckle
- Passively collapsing through the shoulders
- Forcing the shoulder blades into one predetermined position
- Holding the breath
- Ignoring wrist discomfort
- Treating pain as evidence that the posture is working
- Trying to reproduce somebody else’s shape
Function matters more than appearance.
Your Downward Dog should reflect the body performing it.
3. Legs-Up-the-Wall – Viparita Karani
After exploring a more active position such as Downward Dog, Legs-Up-the-Wall gives us the opportunity to deliberately reduce muscular demand.
And that contrast matters.
We don’t need every part of a yoga practice to challenge our maximum strength or mobility.
Recovery is part of training.
Why Include Legs-Up-the-Wall?
This position can provide:
- A low-demand resting position
- An opportunity to reduce muscular effort
- Time to observe your breathing
- A transition from movement towards stillness
- Greater awareness of unnecessary muscular tension
- A simple recovery option at the end of practice
You’ll sometimes hear claims that Legs-Up-the-Wall “flushes toxins” from the body or dramatically improves immune function.
We don’t need those claims to make the posture valuable.
Sometimes a comfortable position that allows you to stop doing so much is enough.
Start Here
Sit sideways beside a wall.
Lower yourself onto your side and gradually rotate onto your back while bringing your legs towards the wall.
Your pelvis doesn’t need to touch the wall.
In fact, moving further away may make the position considerably more comfortable depending on your hamstring range and pelvic position.
Let your legs rest.
Allow your arms to find a comfortable position.
Support your head if necessary.
Then reduce the amount of work you’re doing.
Don’t Force Relaxation
We often hear instructions such as:
“Relax your nervous system.”
But your nervous system isn’t a light switch.
You cannot simply command yourself into a parasympathetic state because you’ve placed your legs against a wall.
What you can do is create conditions that may support a reduction in arousal.
Reduce unnecessary muscular effort.
Make yourself physically comfortable.
Allow the environment to become quieter.
Notice your breathing.
Give yourself time.
Then observe the response.
This is another reason I don’t want you to force a particular breathing pattern.
You might notice that the breath gradually becomes slower.
You might notice less effort around the jaw, neck or shoulders.
You might notice absolutely nothing for the first few minutes.
All of that is information.
The practice is to become aware of what is actually happening rather than deciding what you think should be happening.
Scan the Body
Bring your attention towards your jaw.
Your shoulders.
Your hands.
Your abdomen.
Your hips.
Your legs.
Where are you producing muscular effort that isn’t required to maintain the position?
See whether you can reduce some of it.
Not because tension is inherently bad.
Muscular tension is essential whenever we need to produce force.
The question is whether that tension is useful right now.
Stay for several minutes if the position remains comfortable.
When you’re ready to finish, bend your knees, roll onto your side and take your time returning to sitting.
Common Mistakes
- Forcing the pelvis too close to the wall
- Locking the knees unnecessarily
- Actively holding the legs up rather than allowing the wall to support them
- Trying to manufacture extremely slow breathing
- Assuming you should immediately feel relaxed
- Remaining in the position despite discomfort
- Getting up quickly after a prolonged period of rest
The quieter the posture becomes, the less you may need to add to it.
A Simple Yoga Practice for Overall Wellbeing
You don’t need a complicated 60-minute sequence to make movement worthwhile.
Try this simple progression.
1. Downward-Facing Dog
Use Downward Dog as the more active component.
Explore your hand contact, wrists, shoulders, hips and legs.
Move rather than immediately trying to hold a static position.
2. Child’s Pose
Reduce the physical demand.
Notice how your breathing changes when the position of your trunk changes.
Explore the posterior and lateral movement of your rib cage without forcing a bigger breath.
3. Legs-Up-the-Wall
Finish by substantially reducing muscular effort.
Give yourself several minutes without needing to achieve anything.
The exact number of breaths isn’t particularly important.
Neither is holding each posture for an arbitrary amount of time.
What matters more is understanding why you’re doing what you’re doing.
Movement Should Have an Intention
This is one of the foundations of how I teach.
Don’t add exercises simply because they look good on Instagram or because somebody told you they are “good for you”.
Ask:
What am I trying to develop?
Strength?
Active mobility?
Passive range?
Coordination?
Breathing awareness?
Recovery?
The same posture can be used differently depending on the intention.
And sometimes the exercise you need isn’t the one you’re already good at.
Part of intelligent practice is identifying what you’re not currently doing and deciding whether developing that capacity would be useful.
That is a very different approach from repeatedly performing the shapes that already feel comfortable.
How to Practise When You’re Feeling Run Down
There is an important difference between being slightly tired and being genuinely unwell.
If you’ve had a demanding day and simply feel fatigued, some gentle movement may feel appropriate.
But if you’re experiencing fever, significant weakness, difficulty breathing, worsening symptoms or another acute illness, don’t assume that pushing through a yoga practice demonstrates discipline.
Sometimes the intelligent decision is to rest.
Exercise creates demand.
Your body then needs sufficient capacity to adapt to that demand.
If your system is already dealing with illness, adding more physical stress isn’t automatically useful.
If you have an existing medical condition, are recovering from illness or aren’t sure whether exercise is appropriate, speak to an appropriately qualified healthcare professional.
Yoga can complement your approach to health.
It shouldn’t replace medical diagnosis or treatment.
Common Mistakes When Using Yoga for Immune Health
1. Searching for a “Magic” Pose
There isn’t one yoga posture that guarantees a stronger immune system.
Your health is far more complex than that.
Think in terms of your overall habits rather than searching for a single intervention.
2. Assuming More Intensity Is Better
Intensity is a tool.
It isn’t the goal.
There are times when challenging your strength, cardiovascular system or mobility is entirely appropriate.
There are also times when reducing demand is the better decision.
The skill lies in knowing the difference.
3. Confusing Flexibility With Mobility
Being able to passively access a large range of motion doesn’t necessarily mean you can actively control it.
Develop passive range where appropriate, but also build the strength and coordination required to own that range.
4. Ignoring Sleep and Recovery
Yoga cannot compensate for chronically inadequate sleep or recovery.
If your body is asking for rest, another demanding practice isn’t necessarily the answer.
Sometimes the best thing you can do for tomorrow’s practice is go to bed.
5. Forcing Your Breathing
More breath isn’t automatically better breath.
Trying to inhale as deeply as possible can introduce unnecessary tension and, for some people, create feelings of light-headedness or discomfort.
Instead, develop awareness of how your rib cage, diaphragm and abdominal wall interact.
Breathing is three-dimensional.
Let it be responsive rather than performative.
6. Practising Through Illness
You don’t need to prove your commitment by training when you’re sick.
Rest when appropriate.
Seek medical advice when necessary.
Then gradually rebuild your normal training load as you recover.
7. Expecting Immediate Results
Health and physical capacity are built through repeated behaviours.
One yoga class isn’t going to transform your immune system.
One mobility session isn’t going to transform your hips.
One strength session isn’t going to transform your handstand.
Adaptation takes time.
Consistency matters.
The A.W.A.R.E. Approach
This way of thinking forms part of the foundation of my A.W.A.R.E. approach:
Align – Witness – Activate – Refine – Evolve.
Rather than forcing your body to conform to a predetermined posture, learn to observe what is actually happening.
What range do you currently have?
What range can you actively control?
Where are you producing force?
Where aren’t you?
How are you distributing load?
How does your breathing respond?
What happens when the demand increases?
And what changes when you reduce it?
The objective isn’t to create the “perfect” yoga posture.
It is to develop a more capable and adaptable practitioner.
Final Thoughts
So, can these three yoga poses boost your immune system?
I wouldn’t make that claim.
There is research investigating relationships between yoga practice, stress, inflammation and markers of immune function, but that is very different from saying that Child’s Pose, Downward Dog or Legs-Up-the-Wall directly strengthens your immunity.
What these postures can give you are opportunities.
Use Downward-Facing Dog to explore load, strength and whole-body movement.
Use Child’s Pose to reduce demand and observe your breathing mechanics.
Use Legs-Up-the-Wall to practise doing less and create space for recovery.
More importantly, learn when your body needs movement and when it needs rest.
Develop strength.
Develop mobility.
Explore both passive and active ranges of motion.
Pay attention to your breathing.
Sleep.
Recover.
Eat well.
And seek appropriate healthcare when you need it.
Yoga doesn’t need exaggerated claims to be valuable.
Move well. Breathe well. Recover properly.
Build those habits consistently and let your yoga practice become one part of a much broader approach to looking after your body.
If you’d like to explore this approach further, you can join my online classes on Patreon or explore the A.W.A.R.E. Mentorship, where we work with biomechanics, functional mobility, strength, breath mechanics and movement strategies tailored to the individual.
Your Content Goes Here