
")
The Tripod Headstand (Sirsasana II): A Comprehensive Guide to Perfecting Your Inversion Technique
Hello, I’m Dav Jones, a dedicated yoga practitioner, and teacher trainer passionate about guiding individuals in their yoga practice and spiritual endeavours. Today, we’re going to take a look at the Tripod Headstand (Sirsasana II), a dynamic and challenging pose from the headstand family. Together, we’ll learn the fundamentals of this inversion and a safe way to perform this pose. I’ll provide insights on how the tripod headstand can greatly improve your balance, strength, and overall yoga practice.
What is a tripod headstand (Sirsasana II)?
The Tripod Headstand (Sirsasana II) is an advanced inverted yoga pose where the body is balanced on the crown of the head and supported by the arms arranged in a tripod. This pose demands technique, balance, and concentration. The engagement of the core, shoulders, and legs is required in order to feel stable in the headstand. It is renowned for improving mental focus, and physical stability.
Tripod Headstand Yoga (Sirsasana II) Basics
Sanskrit: Sirsasana II
Pronunciation: sir-SHAH-sah-nah two
Meaning of Sirsasana II: “Sirs” means head, indicating that this pose is performed on the head with the support of the hands, forming a tripod configuration. This alignment creates a stable base for the inverted posture, emphasising balance, and upper body strength.
Yoga Level: Advanced
Pose Type: Inversion
Preparing for Tripod Headstand (Sirsasana II): Essential Pre-Poses
Before attempting the challenging Tripod Headstand (Sirsasana II), it is crucial to adequately warm-up and prepare the body to ensure safety and effectiveness in the pose. Here’s a brief overview of some essential pre-poses that help develop the necessary strength, stability, and flexibility:

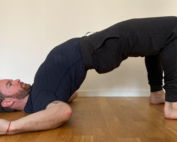
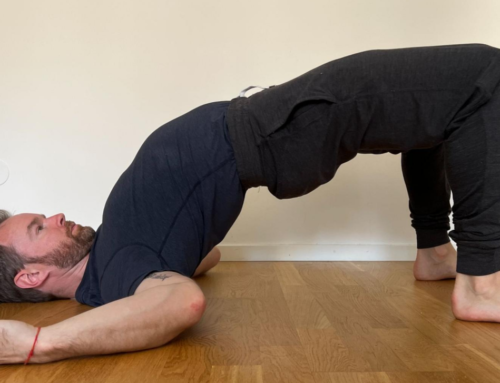
Strengthens the shoulders, arms, and core while opening the chest. Ideal prep posture for building strength in the shoulders and arms.
")
Enhances wrist and arm strength and improves balance, which is vital for maintaining stability in a headstand.

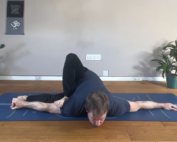
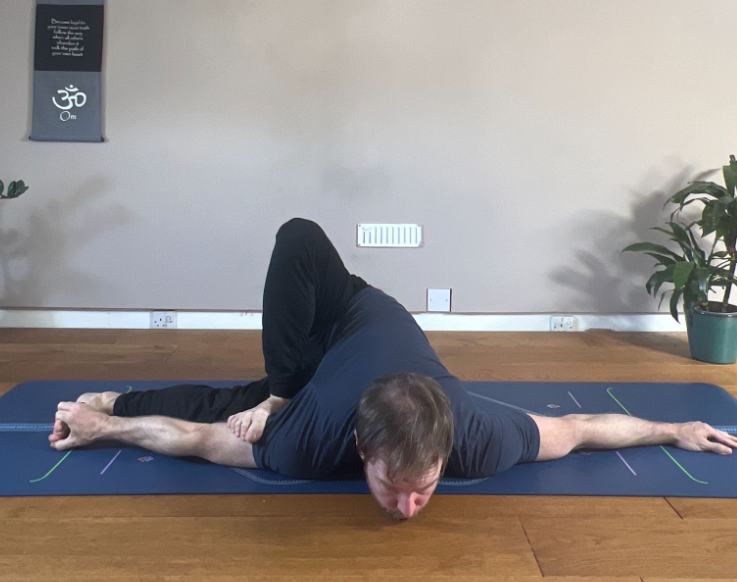
Tripod Headstand Prep Position
Spending time being inverted and placing weight on the head is a worthwhile practice in preparation for Tripod Headstand.

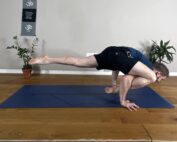
Forearm Plank
Builds core strength. Long holds in this posture can help build the necessary prerequisite strength in the abdominals for headstand.
Steps to Safely Perform a Tripod Headstand (Sirsasana II)
After warming up with the above key preparatory poses, you’re ready to attempt the Tripod Headstand. Here’s a concise guide to entering and maintaining this pose safely:
Step 1. Set Up Your Base

- Begin by kneeling on your yoga mat with the knees together. Place your palms on the mat, roughly aligning the thumbs with the knees. Turn your fingers outward and spread your fingers wide to create a stable base. Position the crown of your head on the mat between your hands, forming a sturdy tripod base with your palms and head.
Step 2. Preparing for Lift-Off

- From the kneeling position, straighten your legs and begin walking your feet toward your hands. Continue this movement until your hips align directly over your shoulders. This alignment helps prepare your body for more of a stacked centre of gravity when it comes to lifting off.
Step 3. Placing the Knees on the Triceps

- Place the knees on the triceps. This step is a vital one as it allows the practitioner to check in with their arm position. We are aiming to have the elbows stacked over the wrists and the fingers turned out to keep the elbows hugging inwards.
- Draw the heels of the feet towards the buttocks.
Step 4. Tripod Headstand Tuck Position

- Slowly lift the knees off your Triceps bringing the thighs together. Bring the thighs to the height of the hip into a tuck position.
- To maintain stability, hug the elbows inwards towards each other, and hug the thighs together.
Step 5. Tripod Headstand Single Leg

- After a few breaths in the Tripod Tuck position, slowly start to straighten through one leg. Keeping the other leg in a tuck position.
- Continue to hug elbows towards each other.
- Keep shoulders depressed (shrugging downwards towards hips). This keeps pressures off the neck region.
Step 6. Final Position – Tripod Headstand.

- Keeping the stability through the arms and core, slowly start to straighten the bent leg, gradually bringing feet together.
- Hug heels together and engage the glute muscles to stay stable through the headstand.
Step 7. Hold and Breathe
- Maintain the pose: Focus on your breathing and try to hold the pose for a few breaths or longer, depending on your comfort and skill level.
Step 7. Exit Carefully
- Lower your legs: Reverse the steps to come down safely. Bend your knees, lower your feet to the ground, and sit back into Child’s Pose to relax and allow your blood circulation to normalise.
Avoid the tripod headstand if you have:
Tripod Headstand Benefits
Practising the Tripod Headstand (Sirsasana II) offers a range of benefits across physical and mental dimensions. Here are some of the advantages:
Beginner’s Tips for Tripod Headstand
Here’s a concise list of beginner tips for practicing the Tripod Headstand (Sirsasana II) safely and effectively:
- Build Foundation: Master basic poses like Dolphin and Crow poses for strength.
- Use Props: Practice near a wall and use padding for the head for safety and comfort.
- Hand Placement: Set hands shoulder-width apart, forming a triangle with your head and hands.
- Progress Slowly: Start by lifting one foot at a time, and build to both.
- Alignment Focus: Keep hips over shoulders for balance.
- Listen to Your Body: Exit the pose if you feel discomfort, especially in the neck or spine.
- Rest Afterward: Use the child’s pose to recover and normalise blood flow.
- Seek guidance: Practice with an experienced yoga teacher for proper technique.
- Contraindications: Avoid if you have high blood pressure, neck/back issues, or other relevant health conditions.
- Be Patient: Develop skills gradually and be patient with your progress.
What is the difference between a tripod headstand and a headstand?
The tripod headstand (Sirsasana II) and the traditional headstand (Sirsasana I) are both inverted yoga poses where the body is balanced on the head, but they differ in their setup and difficulty. In the Tripod Headstand, you balance on your head and two hands forming a triangular base, requiring more arm strength.
The traditional headstand uses a broader base with the forearms on the ground, making it more stable and easier for beginners. Thus, the tripod headstand is more challenging, requiring strong arms and balance, while the traditional headstand is more stable and beginner-friendly.
Final Thought
We’ve explored Tripod Headstand, highlighting its techniques and benefits for enhancing your yoga asana practice. If you’re interested in deepening your practice, consider joining the Dav Jones Yoga membership online yoga classes on Patreon. If you’re looking for a more tailored/specific approach to your practice, then take a look at the Dav Jones Yoga mentorship program.
FAQs


