 Skip to content
")
Peacock Pose (Mayurasana) Mastery: Techniques & Benefits
Hi, I am Dav Jones, a dedicated yoga practitioner, and yoga teacher trainer. Today, we’ll dive into the Peacock Pose (Mayurasana) and explore its benefits and application. Whether you’re a yoga beginner or an experienced yogi looking to challenge yourself, you’ve come to the right place to deepen your practice. Let’s embark on this exciting journey together and uncover the strength and elegance of the Peacock Pose (Mayurasana).
What is Peacock Pose (Mayurasana)?
Peacock Pose, or Mayurasana, is a challenging yoga pose where you balance your body with your hands. Named after the beautiful peacock bird, this pose expresses a beautifully elegant shape representing a similar nature to that of a Peacock. In Peacock Pose, your body is parallel to the ground, supported by your elbows and hands, while your legs stretch out behind you. It requires significant strength and balance. Practising this pose can enhance your physical and mental discipline.
Peacock Pose (Mayurasana) Basics
Sanskrit: Mayurasana
Pronunciation: “My-oor-ah-sa-na”
Meaning: Named after the majestic peacock, this pose symbolises beauty and pride. This pose emphasises strength, focus, and balance, capturing the elegance and poise of a peacock.
Preparatory Poses for Peacock Pose (Mayurasana)
Before attempting the Peacock Pose, building the necessary strength, flexibility, and balance is essential. Here are some preparatory poses to help you get ready:
1. Wrist Warm-up

Wrist Extensor Stretch

Wrist Flexor Stretch

Wrist Flexors & Neck Stretch Left Side

Wrist Flexors & Neck Stretch Right Side
- Focus: Mobilise wrists and stretch the muscles of the forearms.
- How to: Come into an all-fours position.
- Stretch the muscles of the forearms on both front (Wrist Extensor Stretch) and back (Wrist Flexor Stretch)
- Turn the fingers out to the side and widen the width of your hands slightly wider than the width of your shoulders.
- Lean your weight to the right side and hold the stretch for 8/10 breaths.
- *9Lean your weight to the left side and hold the stretch for 8/10 breaths.
2. Plank Pose (Phalakasana) – ‘Hollowbody Variation’
 – ‘Hollowbody Variation’")
- Focus: Strengthens wrists, arms, and core.
- How to: Start in an all-fours position.
- Tuck the toes and lift the knees.
- Walk the feet back and straighten through the knees contracting the quadriceps muscles.
- Round (flex) your spine, pushing down through the arms. Spread the shoulder blades away from the spine in protraction.
3. Chaturanga Dandasana (Variation for Mayurasana Preparation)
")
- Focus: Develop wrist and arm strength by mimicking the similar position of the arms as you do in Mayurasana (Peacock Pose)
- How to do it: Start in the Plank position.
- Turn your fingers out to the side of the mat
- Lean forward into your shoulders and slowly bend the elbows to about 90 degrees.
- Hold in this Chaturanga variation for up to 5 breaths.
- Return to Plank Pose and repeat the Chaturanga variation up to 3 more rounds.
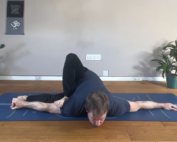
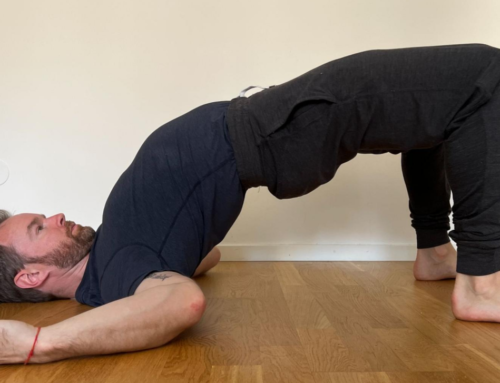
4. Locust Pose (Shalabhasana)
")
- Focus: Strengthen the Posterior chain of muscles, especially lower back muscles.
- How to do it: From a Prone position (lying on your belly)
- Place your hands beside your hips
- Inhale, breathe the belly into the mat. Exhale, lift the chest, feet, and arms off the mat, arching through your spine.
- Maintain the locust pose for up to 5 breaths. With each exhaled breath, practice lifting the chest and feet. Draw the arms towards each other, and reach the fingers for the feet.
Step-by-Step Guide to Peacock Pose (Mayurasana)
Peacock Pose (Mayurasana) is a powerful arm balance that requires strength, focus, and practice. Follow this detailed guide to gain mastery over the pose:

STEP 1 – Warm-Up:
- Begin with a thorough warm-up to prepare your body.
Focus on warming up:
– Wrists
– Posterior (back) muscles of the body
– The arms in a bent-arm position.
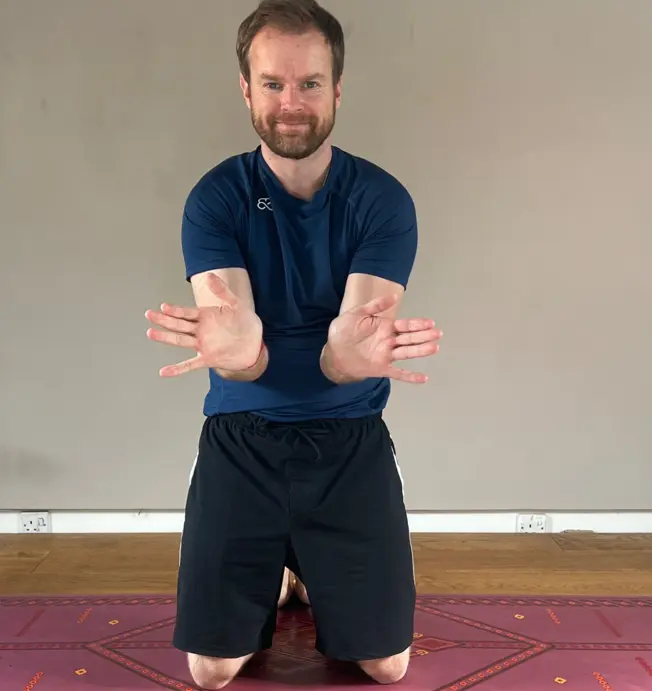
STEP 2 – Find Your Foundation:
- The placement of the hands and fingers is pivotal.
- I would suggest a couple of hand positions in the teaching of Mayurasana:

Fingers Turned Back

Fingers Turned to the Side
- Have a practice with which wrist option from the above images feels more comfortable for your wrists. This is the wrist alignment option which will suit you whilst practising Mayurasana.
STEP 3 – Elbow Placement:
- From a kneeling position, with the fingers in the chosen alignment from STEP 2, bend your elbows and rest them on the abdomen between the lower ribs and top of the hip.
- The elbows will rest on the soft tissue of the abdomen.

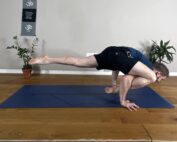
STEP 4 – Explore different variations of Peacock Pose.
- There are many variations you can practise before practising the full expression (straight legs) of Mayurasana.
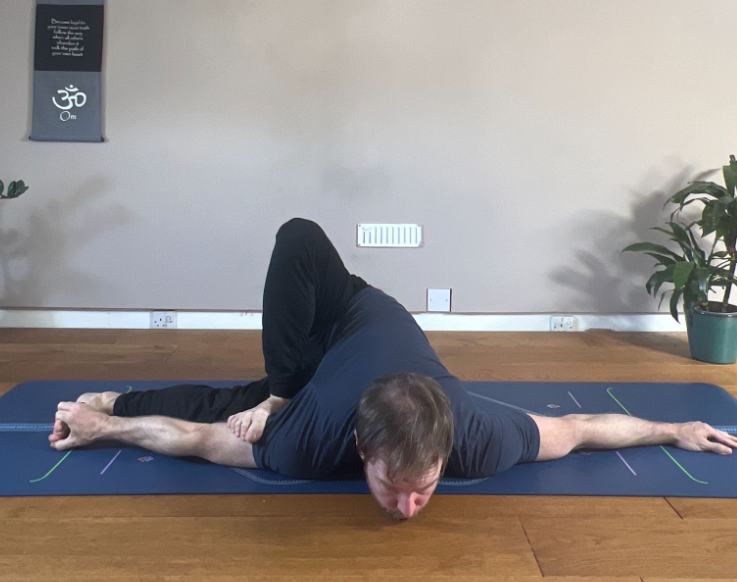
Mayurasana – Butterfly Variation (Baddha Konasana)
")
Eka Pada Mayurasana – Single Leg Peacock Pose

Padma Mayurasana – Lotus Peacock Pose

STEP 5 – Lift and try to balance.
- Try now to have a go at the full expression of Peacock Pose with straight legs.
- TIP: Imagine the body acting like a ‘see-saw.’ In order to achieve balance, we have to find similar weight distribution at opposite ends of the body – the feet and head.
- To do this, practice lifting up through the chest, and lifting up through the outstretched legs.

Tips for Success
- Engage Your Core: Keep your core muscles activated throughout the pose to maintain stability and balance.
- Distribute Weight Evenly: Ensure the weight is evenly distributed between your forearms and hands.
- Keep Your Gaze Forward: Focus your gaze slightly forward to help with balance and alignment.
- Practice Patience: This pose requires practice and patience. Don’t rush the process, and gradually build your strength and confidence.
Benefits of Peacock Pose (Mayurasana)
Peacock Pose (Mayurasana) offers a multitude of benefits that extend beyond just physical strength. Here are some of the key advantages of incorporating this challenging pose into your yoga practice:
1. Strengthens Wrists and forearms:
- Balancing your body on your forearms and wrists builds significant strength in these areas, which is crucial for other arm balances and daily activities.
2. Improves Digestion:
- The pressure applied to the abdomen during the pose stimulates the digestive organs, aiding in better digestion and detoxification.
3. Boosts Balance and Coordination:
- Maintaining the pose requires a strong sense of balance and coordination, enhancing these skills with regular practice.
4. Increases focus and concentration:
- The focus needed to achieve and hold Peacock Pose can sharpen mental clarity and concentration, beneficial both on and off the mat.
5. Promotes mental discipline:
- Mastering such a challenging pose cultivates mental resilience and determination, encouraging a disciplined approach to practise.
6. Enhances arm, shoulder, and posterior muscle strength:
- The demand on the arms and shoulders in the Peacock pose significantly strengthens these muscles, preparing them for more advanced postures.
- Due to the nature of trying to lift the chest and legs, peacock pose strengthens the posterior muscles of the body. Including the lower and mid-back and glutes.
7. Encourages emotional balance:
- Practising arm balances like Peacock Pose can help release pent-up emotions, fostering a sense of emotional equilibrium.
8. Builds Confidence:
- Achieving Peacock Pose can provide a sense of accomplishment and boost self-esteem, motivating further progress in your life and yoga journey.
Beginner Tips for Peacock Pose (Mayurasana)
Peacock Pose (Mayurasana) is a challenging pose, especially for beginners. Here are some practical tips to help you get started and progress safely:
- Build Wrist Strength:
- Exercises: Perform wrist stretches (refer to the wrist stretches suggested above) and action wrist strengthening exercises regularly. Wrist circles, flexing, and extending as well as adding gradual weight can help build resilience.
- Warm-Up: Always warm up your wrists before attempting Peacock Pose.
2. Strengthen Your Core:
- Core Workouts: Incorporate core-strengthening exercises like planks, boat poses, and leg lifts into your routine. A strong core is essential for maintaining balance in the Peacock Pose.
3. Start with Preparatory Poses:
- Foundational Poses: Practice poses like Plank, Forearm Plank, Locust Pose to build the strength and stability needed for Peacock Pose.
- Progress Gradually: Don’t rush into the full pose. Give yourself patience in building the prerequisite strength in the required areas.
- Use Props: Place yoga blocks under your shoulders or forehead to help with balance and reduce the strain on your wrists.
- Straps: Use a strap around your upper arms to prevent them from splaying out and provide extra support.
4. Focus on Alignment:
- Elbow Placement: Ensure your elbows are firmly pressed into your abdomen. This helps distribute the weight evenly and maintain balance.
- Body Position: Keep your body straight and parallel to the ground. Avoid sagging your hips or raising them too high.
5. Practice Patience:
- Small Steps: Break down the pose into manageable steps and focus on one aspect at a time.
- Consistency: Practise regularly but avoid overdoing it. Consistent practice over time leads to progress.
6. Seek Guidance:
- Instructor Help: If possible, practice under the supervision of a qualified yoga instructor. They can provide personalised tips and adjustments.
- Use Resources: Watch video tutorials and read guides to understand the correct form and technique.
7. Listen to Your Body:
- Avoid Pain: If you experience pain (especially in your wrists or shoulders), stop immediately and reassess your form.
- Rest: Give your body time to rest and recover between practice sessions.
8. Stay Positive:
- Mindset: Cultivate a positive mindset and be patient with your progress. Yoga is a journey, not a destination.
- Celebrate Small Wins: Acknowledge and celebrate small achievements along the way.
Safety and Precautions for Peacock Pose (Mayurasana)
When practising Peacock Pose (Mayurasana), prioritise safety to prevent injury. Avoid this pose if you have wrist, shoulder, or lower back injuries, high blood pressure, or heart conditions. Pregnant individuals should also refrain due to the abdominal pressure involved. Always warm up thoroughly and consider using props for support. Practice under the guidance of a qualified instructor to ensure safe application and technique. Listening to your body and progressing gradually is key to safely mastering this advanced pose.
Final Thought
We’ve explored Peacock Pose, highlighting its steps and benefits for enhancing your yoga asana practice. If you’re interested in deepening your practice, consider joining the Dav Jones online yoga classes on Patreon. For a more tailored/specific approach to your practice, then take a look at the Dav Jones Yoga mentorship program.


